To view the full installation guide for our Recycled Leather Series, click here.
Read on for your guide for our BioFibre Series offering.
Karta floors are a great choice for homeowners looking to add beauty, durability, and a touch of modern elegance to their interior spaces. Whether you’re planning to install this type of flooring in your home or looking for guidance on the subject, this step-by-step guide help you to get it right.
Gather Your Materials
Begin by gathering all the necessary materials and tools:
- Karta Flooring
- Tongue & Groove Adhesive
- Moisture barrier underlay
- Aluminium Tape
- Circular saw
- Measuring tape
- Pencil
- A carpenter’s square
- A rubber mallet
- A tapping block
- Spacers
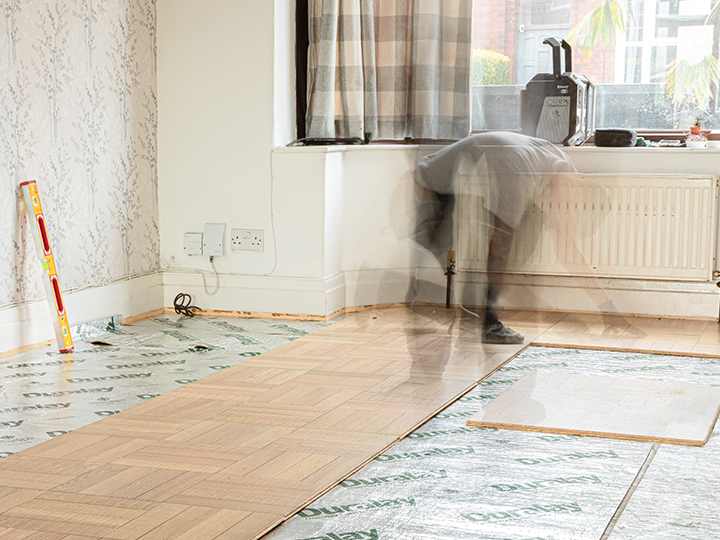
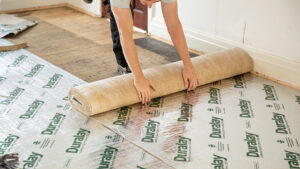
Prepare the Subfloor
Before you start laying tongue and groove panels, it’s crucial to prepare the subfloor. Ensure it’s clean, level, and free from any debris or imperfections. Install a moisture barrier underlay to protect your new flooring from moisture and humidity using the aluminium tape to bond the gaps together.
Measure and Plan
Carefully measure the dimensions of the room to determine how to get the most out of your panels. Start planning the layout by assessing the room’s shape and considering how you want the panels to be oriented.
Install the First Row
Begin by laying the first row of panels along one wall. Leave a small gap between the panels and the wall (approximately 12-15mm) to allow for expansion. Use spacers to maintain consistent gaps around the walls.
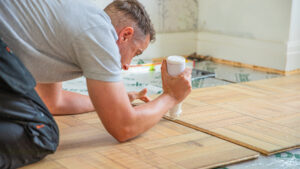
Apply Adhesive
Apply Karta’s Tongue & Groove adhesive to the groove, and then slide the tongue of the panel from the first row into it. Use a tapping block and a rubber mallet to ensure the panels fit snugly together. Repeat this process for the entire second row.
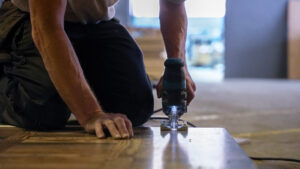
Cut Panels to Fit
Measure and cut panels as needed to fit the end of each row. A circular saw works well for making precise cuts. Remember to measure twice and cut once to avoid waste.

Continue Installation
Continue the process, row by row, until you’ve covered the entire floor area. Be sure to stagger the joints if you are using our planks for a more stable and visually appealing result.
Cut Panels for Obstacles
When you encounter obstacles such as doorways, radiator, or irregular room shapes, measure and cut panels accordingly to fit around them.
Finish and Enjoy
Once all the panels are in place, remove the spacers, and apply any necessary moulding or trim around the edges of the room. Finally, your Karta flooring is ready for finishing touches, such as skirting or pipe ferrule, to enhance its appearance and durability.